I Used My Paolaroid Mini but the Picture Came Out Blue Indoors Lots of Lightin
There's nothing as disappointing for an Instax user as waiting for a photo to develop, only to discover that it has turned out completely white.
When this happens, it almost always means that the image has been overexposed.
Overexposure is caused when the film is exposed to too much light. Likewise, underexposure (excessively dark images) occurs when not enough light falls on the film.
If you are reading this article, you are probably wondering why some of your Instax Mini 9 images have turned out overexposed. Well, below we (hopefully) have the answer!
Ethics statement: We bought the Mini 9 for our personal use. We were not asked to write anything about the camera, nor were we provided with any sort of compensation. Within the article, there are affiliate links. If you buy something after clicking the link, we will receive a small commission. To know more about our ethics, you can visit our full disclosure page. Thank you!
The wrong setting was chosen
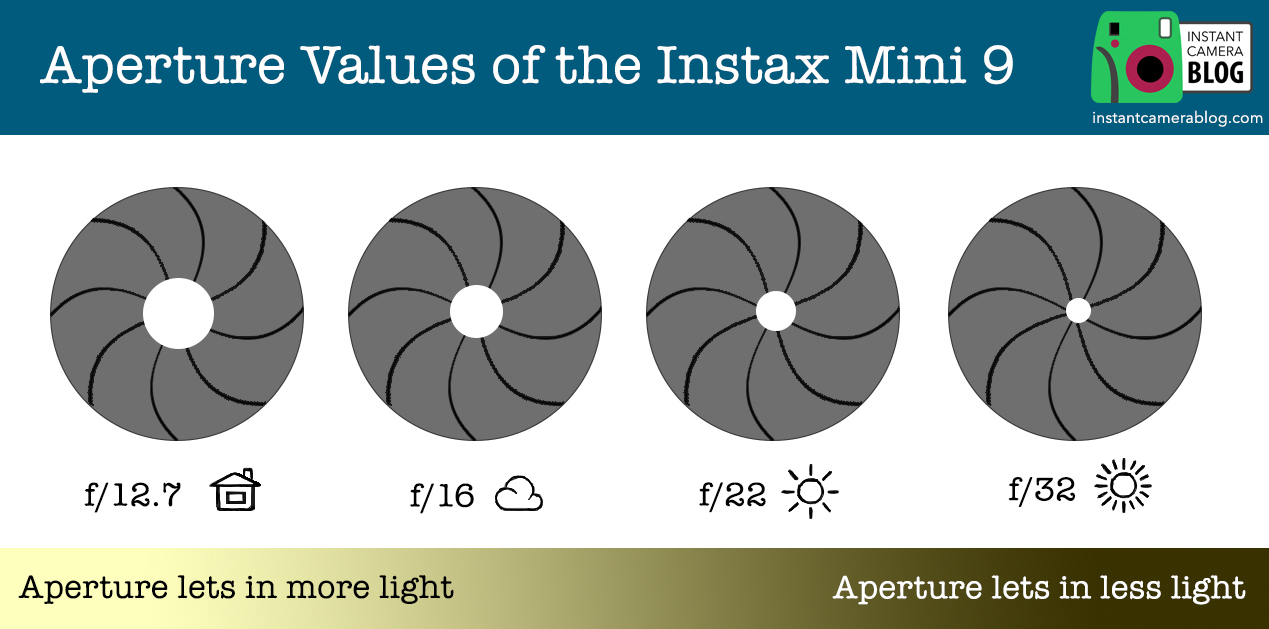
On the Instax Mini 9, you can choose between five different brightness settings on the lens adjustment dial: Very Sunny, Sunny, Cloudy, Indoors and High Key.
Each brightness setting corresponds to an aperture value – the higher the value, the smaller the aperture, and the less light hits the film.
- Very Sunny: f/32 (smallest aperture; very little light allowed in)
- Sunny: f/22
- Cloudy: f/16
- Indoors: f/12.7 (largest aperture; lots of light allowed in)
- High Key: Allows you to take brighter images with a softer look. Note that the camera will never choose this setting on its own. More on this setting further down.
The camera will automatically suggest the ideal setting by reading the intensity of the ambient light and illuminating the appropriate lamp on the dial.
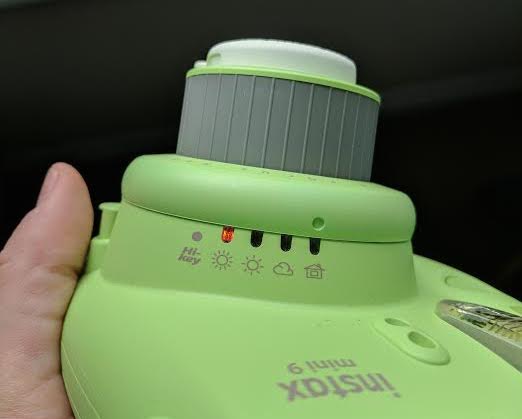
The camera has suggested Very Sunny by lighting up the corresponding icon on the brightness adjustment dial.
Overexposure occurs when you choose a dark setting (such as Cloudy or Indoors) on a bright and sunny day. This is because you are telling the camera to let more light hit the film than is actually necessary for a proper exposure.
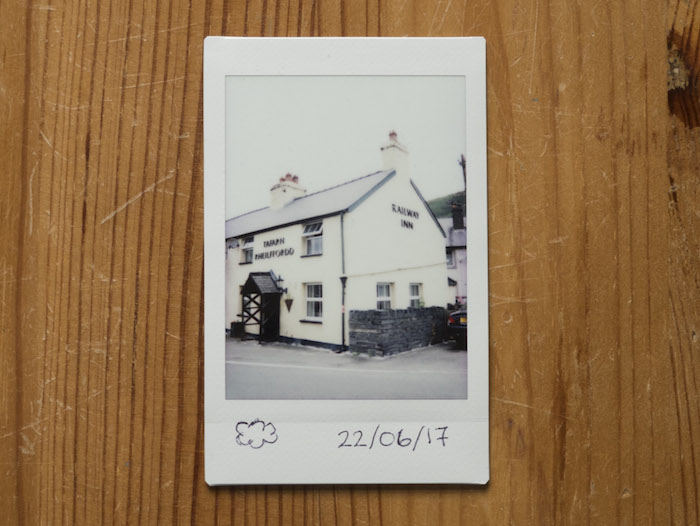
Below is a good example of overexposure occurring on an overcast day. Although the camera was telling me to use Sunny, I decided to use Cloudy because I thought it was too overcast to use one of the brighter settings. It turns out I should have listened to the camera! 🙂
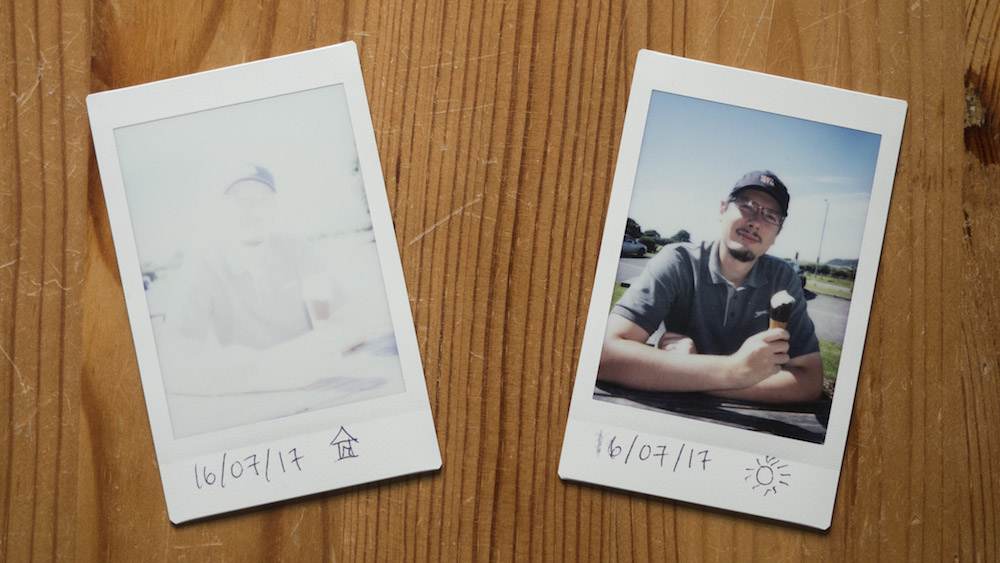
Another good example is the pair of images below of my "better half" Mathieu eating an ice cream. I accidentally forgot to switch the setting from Indoors to Very Sunny and the resulting exposure is completely washed out. Since I liked the image, I decided it was worth re-taking – this time with the Very Sunny setting – and it turned out fine.
The take-home message here is before taking any shot, check to see which setting the camera has recommended and change it accordingly. Otherwise you might be in for a bit of a surprise!
The film was already exposed to light
One of the biggest mistakes you can make with instant photography is exposing your film to light before you've even begun taking photos, as doing so will turn completely overexposure the entire pack.
This can happen if you happen to be in direct sunlight while loading the film pack, or if you open the back of the camera and remove the film before you've used it up.
In either case, the only solution is to throw the overexposed pack away and start again!
Your subject is too bright
A few times while taking pictures on very bright, sunny days, I found that my images were brighter than I wanted them to be even though I was using the Very Sunny setting.
Take this picture of Aberystwyth Pier for example. Despite having used the Very Sunny setting, the image is still quite bright in certain areas of the frame, particularly the pier and the hill in the background.
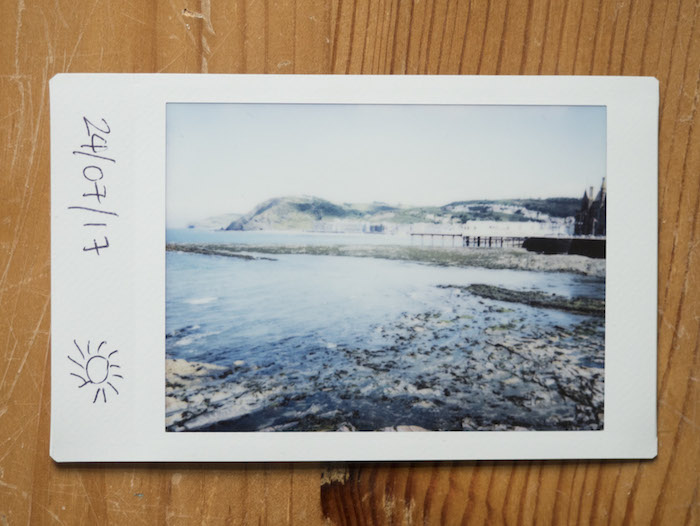
There isn't much you can do in these situations except to shoot later in the day or wait for some clouds to roll in.
Also avoid shooting in the direction of the sun: not only will any image you take be completely overexposed but even more importantly, you risk damaging your eyesight.
Overexposure for creative effect
Though no one wants to end up with a "polar bear in a snowstorm" type of image, many photographers do enjoy slightly overexposing their images for creative effect.
The most common practice with the Instax Mini 9 is to choose the setting that is one stop darker than the setting the camera suggests. (Remember, the darker the setting, the more light the camera lets in!) In the case of Very Sunny, that would be Sunny, and so on. Doing so can give your image a bright and cheerful feel without washing out too many colours or details.
Another way is to use the High Key setting mentioned above. When you are in a dimly lit place such as a restaurant, High Key does the job of both brightening and softening the image. Avoid using it during the day though, as it will completely wash out your image.
The moral of the story is that there is no right or wrong way to approach exposure. The important thing is that you achieve your desired effect … and don't wind up with a series of blank frames! 😉
If you have any interesting shots you've purposely overexposed for creative effect, why not share them with us below!
You might also enjoy the following articles:
- Instax Mini 9 Review
- My favourite Instax Mini 9 accessories
Found this article useful? Please take a moment to pin it!

Source: https://instantcamerablog.com/tips-and-tricks/instax-mini-9-film-overexposed/